Console Table Production Process in an Istanbul Factory: From Timber Selection to Final Finish
A stage-by-stage walk through how a wooden console table is made to order, with the checks buyers can request at each point. Useful for hotel owners, designers and procurement teams ordering from overseas.
The console table production process follows a clear sequence: drawing approval, timber selection, drying and cutting, machining, assembly, sanding, finishing and packing. Knowing these stages helps you decide when to ask for photos, when to approve a sample and where problems are cheapest to fix. This guide explains how furniture is made in our Istanbul factory for made-to-order hospitality projects shipped worldwide.
We write it from a buyer's point of view. Each section says what happens and what you can reasonably ask to see.
Stage 1: Drawings and specification sign-off
Production starts on paper. Before any timber is cut, the factory prepares shop drawings from your reference photo, sketch, CAD file or designer's drawing. These show elevations, sections, joinery and the finish code.
This is the best moment to check dimensions, top thickness, leg setback, wall clearance, cable cut-outs and hardware. A change here costs only time; the same change after cutting costs material.
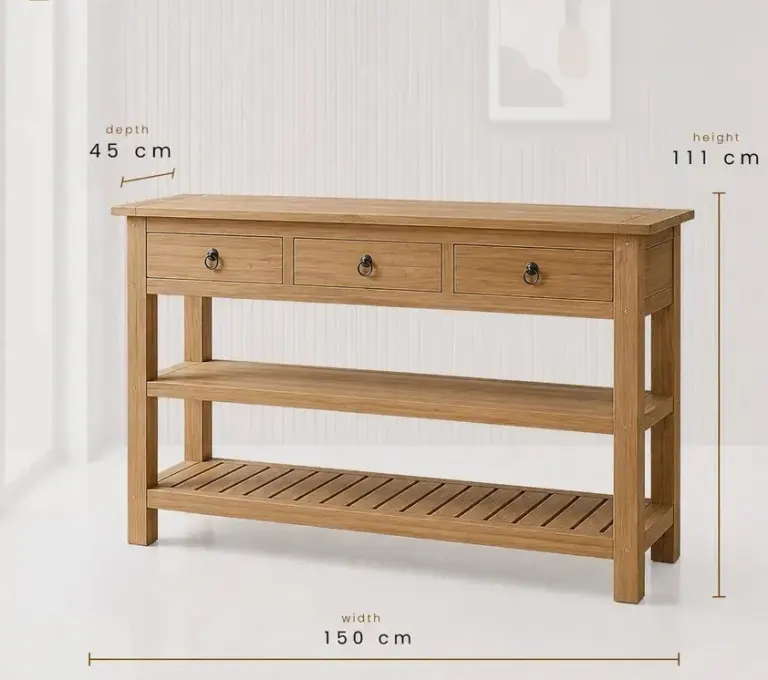
- Confirm overall length, depth and height in millimetres (and inches if your team works in imperial).
- Confirm wood species or veneer, and any stone or glass top.
- Confirm finish type, colour reference and gloss level.
- Confirm how the piece is fixed, levelled or anchored on site.
Stage 2: Timber selection and grading
Solid wood and veneered panels are chosen against the approved specification. For solid parts, the factory looks at grain direction, knots, colour range and straightness. For veneer, sheets are sorted so that colour and figure stay consistent across the batch.
What to ask for: a photo of the selected boards or veneer bundles next to the approved sample. If grain matching matters, for example on a walnut top, say so in the specification.
Moisture content and drying
Wood must be properly dried before machining, otherwise tops cup, joints open and finishes crack after the piece reaches a different climate. Boards are normally kiln-dried and allowed to stabilise in the workshop before they are cut. You can request the moisture reading recorded for your batch if your project is going to a very dry or very humid destination.
Stage 3: Cutting and CNC machining
Once the material is ready, panels and solid parts are cut to size. CNC wood furniture machining is used for repeatable work such as curved legs, routed grooves, fluted fronts, drawer pockets, hinge holes and cable cut-outs. CNC does not replace craftsmanship; it gives consistent dimensions so that 50 or 200 pieces match the approved sample.
Some details still need skilled hands, such as shaping an unusual edge profile, fitting a veneer sequence or carving. A good factory combines both methods according to the design.
- Ask whether your design uses a CNC programme, so repeat orders can be matched later.
- Ask for a check of the first cut piece against the drawing before the full batch is cut.
Stage 4: Veneering, edge banding and panel work
If the console uses veneered MDF or plywood, the veneer is pressed onto the core and then trimmed. Edges are finished with solid wood strips, matching veneer or edge banding, depending on the design.
This stage determines how the piece wears. Weak glue lines or poorly trimmed edges show up later as lifting corners. When you inspect photos, look at the edge junctions, corners and the visible joint between top and apron.
Stage 5: Joinery and assembly
Parts are dry-fitted first, then glued and clamped. Common methods include mortise and tenon, dowels and concealed metal fixings. The leg-to-top connection is the key point for stability, so it deserves a close look.
Hardware such as soft-close runners and hinges is fitted at this stage or after finishing, depending on the design. Drawers and doors should open smoothly and sit flush before the piece moves on.
What to inspect after assembly
- Square corners and flat top surface.
- No rocking on a flat reference surface.
- Even gaps around drawers and doors.
- Glue squeeze-out cleaned from visible joints.
Stage 6: Sanding and surface preparation
Sanding gives the surface its final feel. The wood is sanded in steps from coarser to finer grit, and dust is removed before any coating is applied. Sanding marks, pinholes and dents are easiest to correct now, because finishing will make them more visible, not less.
Ask for a close-up photo of the bare wood in raking light. It reveals scratches and uneven areas that a finished surface can hide until the first inspection on site.
Stage 7: The factory finishing line
A factory finishing line applies stain, sealer and topcoats in controlled conditions, with drying time between coats. The result is more even than finishing in an open workshop, and it makes colour repeatable from piece to piece.
Finish options include natural oil, matte or satin lacquer and water-based coatings. The right choice depends on where the piece will stand. A lobby entrance with luggage traffic needs a tougher surface than a low-use suite corner.
- Approve the colour against a finished sample, not a screen image or stain card alone.
- View the sample in the lighting of the final space, because daylight and warm hotel lighting change how wood colour looks.
- Agree on the gloss level in writing.
Stage 8: Final quality check
Before packing, each piece is checked against the drawing and the approved sample. Typical checks cover dimensions, flatness, finish colour, surface defects, hardware function and stability. For multi-piece orders, a few pieces are placed side by side to confirm that colour and grain look consistent.
You can ask for photos or a short video of the checked pieces. Many overseas buyers also use this step for a remote inspection call before shipping is released.
Stage 9: Packing for export
Wooden surfaces, legs and stone tops need protection from knocks, moisture and vibration. Pieces are typically wrapped, corner-protected and placed in cartons or crates, with labels that identify the item and, if required, the room or area. Fragile tops may be packed separately.
Discuss shipping terms such as EXW, FOB, CIF or DAP early, because they decide who is responsible at each point of the journey. If the console is delivered fully assembled or knocked down also affects crate size and site labour.
A simple inspection calendar for buyers
| Stage | What you can request | Why it matters |
|---|---|---|
| Drawings | Shop drawing for sign-off | Prevents dimension and detail errors |
| Materials | Photos of timber or veneer | Confirms species and colour range |
| Machining | First-piece check | Sets the standard for the batch |
| Assembly | Photos of joints and stability test | Reveals weak construction early |
| Sanding | Bare-wood close-ups | Catches defects before coating |
| Finishing | Finish sample in project lighting | Avoids colour disputes |
| Packing | Photos or video before shipment | Confirms quantity and protection |
How long does the process take?
Lead time depends on the design, the quantity, the wood or stone sourced, the finish and how quickly approvals come back. Sample approval and drawing changes often influence the schedule more than the machining itself. We prefer to give a timeline after reviewing your drawings, rather than quote a general figure that may not fit your project.
Working with a factory from overseas
You do not need to visit the factory to stay in control. Clear drawings, a written specification, a signed-off sample and scheduled photo updates give you most of what an on-site visit would. If you do plan to visit, the best times are the first-piece check and the pre-packing inspection.
Next step
If you are planning console tables for a hotel, restaurant or residential project, send us your drawings, reference photos or a short brief with quantities and destination. We will review the design and come back with material suggestions, a production outline and shipping options.
Sıkça Sorulan Sorular
How are wooden console tables made in a factory?
The process starts with approved shop drawings, followed by timber or veneer selection, drying, cutting and CNC machining, assembly, sanding, finishing and packing. Each stage has checks, and you can ask for photos or samples at key points before the order moves on.
Is CNC used for all console table parts?
No. CNC wood furniture machining is used for repeatable cuts such as legs, grooves, hinge holes and cut-outs. Edge profiles, veneer matching, hand sanding and some carving still need skilled workers. The mix depends on your design and quantity.
What should I inspect before a console table is finished?
Check the bare wood after sanding. Look for scratches, pinholes, dents, open joints and uneven edges, and test that the piece sits level without rocking. Fixing these before coating is much easier than after the finish has been applied.
Can I approve a finish sample from overseas?
Yes. The factory can send a finished sample or door-size panel to you. View it in the lighting of the final space, because daylight and artificial light change how wood colour appears. Approve it in writing so production matches it.
How long does console table production take?
It depends on quantity, design complexity, materials, finish and how fast approvals are returned. We give a schedule after reviewing your drawings and order size, so the timeline fits your construction or opening programme.
Can the factory ship console tables worldwide?
Yes. Orders are packed for export and can be shipped under terms such as EXW, FOB, CIF or DAP. Packing method and delivery sequence are agreed during the quotation stage, based on your destination and site conditions.
Every hotel project is different. Send us your drawings or room schedule for a tailored proposal on materials, lead time and shipping.