Console Table Quality Checklist for Receiving Goods on Site
A practical on-site checklist for unpacking, measuring, photographing and accepting console tables delivered to a hotel project. It helps you record issues clearly and keep claims and snagging lists organised.
A reliable console table quality checklist turns delivery day from a rushed handover into a controlled acceptance process. When pallets or crates arrive at your hotel site, you need to confirm quantities, check dimensions, inspect finishes and record any damage while the evidence is still fresh. This guide walks you through that process step by step, so your team can accept good pieces quickly and document problems in a way that supports a fair resolution.
Why delivery day inspection matters
Console tables are visible, finished pieces, often placed in lobbies, corridors and suites where defects are noticed immediately. Once packaging is discarded and pieces are moved or installed, it becomes much harder to show when and how a defect occurred. A structured furniture delivery inspection protects you, the contractor and the supplier.
For orders shipped internationally, the goods may have travelled by road, sea and local truck before reaching you. That makes a clear record on arrival even more useful. We make custom pieces to order for projects worldwide, and we find that buyers who inspect methodically get faster, clearer answers when something needs attention.
Before the delivery arrives
Good acceptance starts before the truck is at the gate. A little preparation saves time on the day.
- Gather the documents: purchase order, approved shop drawings, approved sample photos, finish codes and the packing list.
- Prepare a clean, dry area: you need space to unpack, lay pieces down and walk around them in good light.
- Assign responsibility: name one person to lead the inspection and one to take photos and notes.
- Bring the tools: tape measure, spirit level, torch, camera or phone, marker pens, a clipboard and blank snagging forms.
- Agree the process in advance: confirm with the carrier and your contractor how damage will be noted on the delivery paperwork.
Step 1: Inspect the packaging before opening
Look at the outside of every crate, carton or pallet before anything is opened. External damage is often the first clue to what may be inside.
- Check that labels match the packing list, including piece codes or room references.
- Look for crushed corners, punctures, water stains, torn wrap or broken straps.
- Note any shock or tilt indicators if they were fitted.
- Count the packages and compare with the delivery note before signing.
Photograph each package from a distance and then close up where you see any issue. If you sign for goods, write any visible damage or shortage on the delivery document at that moment, not later.
Step 2: Unpack carefully and in sequence
Open packages one at a time, ideally in a sequence that matches your installation plan. Use a blade carefully so that you do not scratch the surface, and keep all protective material until the inspection is complete.
Lift pieces by the frame, never by the top overhang or a leg alone. Stone or glass tops, if included, should be handled by two people. Keep removed corner protectors, foam and film together, because they can help show how the piece was packed.
Step 3: Verify identity and quantity
First confirm that what you received is what you ordered. This is the quickest check, and it prevents confusion later.
- Match each piece to the order line, model name and room or area reference.
- Confirm quantities by model and size, including any spare tops, legs or hardware.
- Check that fixing kits, brackets, felt pads and levelling feet are present.
- Confirm the finish code on labels against the approved sample.
Step 4: Measure against the approved drawing
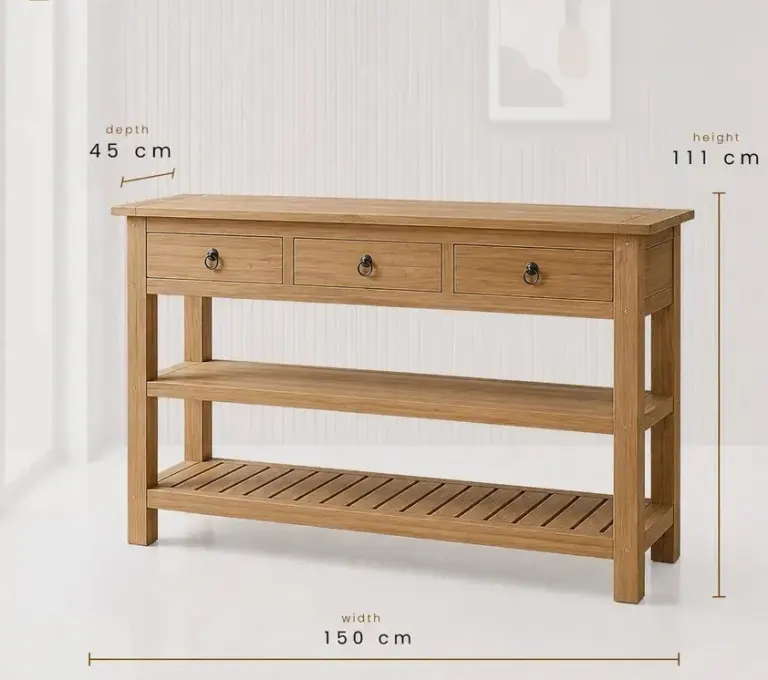
Dimensions are the most objective part of console table acceptance. Compare actual measurements with the approved shop drawing, not with the catalogue or a mood board.
| Check | What to measure | Notes |
|---|---|---|
| Overall length | Widest point of the top | Compare with drawing and agreed tolerance |
| Depth | Front to back at both ends | Useful for tight corridors and niches |
| Height | Floor to top surface | Measure on a flat surface, with feet at standard setting |
| Top thickness | Edge at several points | Check edge profile consistency |
| Leg setback and overhang | Top edge to leg face | Affects proportion and stability |
| Drawer or door openings | Width and height, if fitted | Check even gaps |
Ask your supplier in advance which tolerances apply to your order, as these depend on the material, construction and finish. Measure a sample of pieces carefully and record the results, and measure every piece if the batch is small or the fit is critical, for example in a niche or alcove.
Step 5: Check surface, finish and colour
Inspect each piece in good, even light, preferably daylight or bright neutral lighting. Move around the piece slowly and view the surface from different angles, because some defects only show at a low angle.
- Finish quality: look for runs, dry spots, orange peel, pinholes, dust inclusions and uneven sheen.
- Colour consistency: compare pieces side by side and against the approved sample. Natural wood varies, so agree beforehand what range is acceptable.
- Veneer and grain: check for open joints, bubbling, lifting edges and visible patching.
- Edges and corners: run a hand along them to find chips, rough sanding or exposed core.
- Stone or glass tops: look for chips, cracks, scratches and consistent edge polish.
Remember that approved samples and production pieces may show small natural differences, particularly in wood grain. The goal is to confirm they stay within the agreed range, not to expect identical pieces.
Step 6: Test construction and function
A good-looking piece must also be sound. Carry out simple, non-destructive tests before approving the delivery.
- Place the piece on a flat surface and check for wobble. Adjust feet if fitted.
- Press gently on the top and check that the legs and joints feel solid, with no creaking or movement.
- Open and close drawers and doors several times. Check smooth movement, even gaps and correct alignment.
- Check hardware: handles tight, hinges aligned, runners quiet, locks working if specified.
- Check cable cut-outs, back panels or wall-fixing points against the drawing.
If a wall-mounted or fixed piece is part of the order, check the brackets and fixing details before they are taken to the installation area.
Step 7: Build your photo evidence
Photographs are the backbone of any later discussion. A consistent method makes your evidence easy to understand for anyone who was not on site.
- Photograph the delivery vehicle, pallets and sealed packaging on arrival.
- Take a wide shot of each piece after unpacking, showing the whole item.
- Take close-ups of every defect, with a tape measure or coin beside it for scale.
- Include the piece label or code in at least one photo per item.
- Photograph packing materials where they show impact damage.
- Use a short video for functional issues, such as a sticking drawer or a wobbling leg.
Keep original files with timestamps, and name them clearly, for example by piece code and issue. Avoid editing or cropping the originals.
Step 8: Record damage and snagging items
Use one snagging form for the whole delivery. A clear record helps when you are snagging furniture across many rooms and areas, because every item can be tracked until it is resolved.
| Field | Example entry |
|---|---|
| Piece code and location | Console model and floor or room reference |
| Issue description | Chip on top left edge, approx. 10 mm (0.4 in) |
| Severity | Cosmetic, functional or structural |
| Photo reference | File name or number |
| Proposed action | Repair on site, replace part or replace piece |
| Status | Open, in progress or closed |
Separate shipping damage from manufacturing defects wherever you can, as they may follow different processes. If you are not sure, describe what you see and let the photos speak.
Step 9: Decide on acceptance status
After inspection, give each piece a clear status. This avoids confusion between purchasing, site teams and installers.
- Accepted: matches the drawing and sample within tolerance, with no issues.
- Accepted with notes: minor cosmetic points that can be corrected on site.
- Held: not installed until an issue is clarified.
- Rejected: clear damage or deviation that requires repair or replacement.
Label held and rejected pieces physically, and store them separately so they are not installed by mistake.
Step 10: Report promptly and keep communication clear
Send your report as soon as possible, with the snagging form, photos and delivery paperwork. A short, factual email is usually enough. State the order reference, the number of pieces affected and the action you would like to discuss.
Check your contract for any reporting period, and follow it. Quick reporting also helps the factory identify whether an issue is isolated or linked to a batch, which makes corrective action easier.
Practical tips for large and multi-site deliveries
- Inspect a first delivery in full, then agree a lighter sampling plan if quality is consistent.
- Keep a master list so pieces for each floor or building can be ticked off as they are received.
- Store accepted pieces away from construction dust, moisture and trades traffic until installation.
- Keep a small set of leftover packaging for any pieces that need to be returned.
Conclusion
A solid console table quality checklist is simple: check packaging, verify identity, measure against drawings, inspect finishes, test function, document everything with photos and give each piece a clear status. With this routine, your team can accept good deliveries confidently and handle exceptions in an organised way.
If you are planning a hotel, restaurant or residential project and would like to discuss custom console tables, send us your drawings or brief. We will review the requirements and come back with options, packing details and a delivery plan suited to your destination.
Sıkça Sorulan Sorular
What should I check first when console tables arrive on site?
Start with the outside of the packaging. Check labels against the packing list, count the packages and look for crushed corners, punctures or water marks. Photograph any issue before opening, and write visible damage on the delivery document before signing, so the record is made at the time of handover.
How do I measure console tables for acceptance?
Compare length, depth, height, top thickness and leg setback with the approved shop drawing, using a tape measure on a flat surface. Ask your supplier which tolerances apply to your order. For small batches or tight niches, measure every piece and record the results.
What photos should I take for a damage record?
Take wide shots of the packaging on arrival, each piece after unpacking, and close-ups of every defect with a tape measure for scale. Include the piece label in at least one photo. Keep the original timestamped files and add a short video for functional issues.
Are small colour differences in wood a defect?
Not necessarily. Natural timber and veneer vary in grain and tone, so small differences between a sample and production pieces can be normal. Agree an acceptable range when approving the sample, then compare delivered pieces against it in good light.
When should I report problems to the supplier?
Report as soon as possible, ideally the same day or within the period stated in your contract. Send the snagging form, photos and delivery paperwork together. Prompt, factual reporting helps the supplier identify the cause and propose a repair or replacement.
Every hotel project is different. Send us your drawings or room schedule for a tailored proposal on materials, lead time and shipping.