Console Table Drawings Buyers Should Request: Elevations, Sections and Joinery Details
A console table technical drawing is the document you actually approve, not the render. This guide lists the exact sheets to request and what to check on each before you sign off.
A console table technical drawing is the document that turns a design idea into something a factory can build, and it is the document you are really approving when you sign off. Renders show mood; drawings show dimensions, construction and tolerances. This guide lists the exact sheets a buyer should ask for, and what to look for on each one before releasing a production order.
The checklist applies whether you are ordering ten pieces for a boutique hotel or several hundred for a chain. We build to project drawings at our Istanbul factory and ship worldwide, so the sheets below reflect what we find useful on both sides of the table.
Why the drawing set matters more than the render
A render can hide a thin edge, an impossible leg junction or a top that cannot be made in one piece. A drawing set cannot, because every line carries a dimension or a note. If something is missing from the drawings, it is usually missing from the agreement too.
Approving drawings also protects you later. If the delivered piece differs from the signed sheet, you have a clear reference. If it matches the sheet and you dislike it, the discussion is about a change request, not a defect.
Sheet 1: Cover sheet and revision log
Every set should start with a cover sheet. It should show the project name, item code, quantity, drawing number, scale, date and a revision table.
- Item code: must match your FF&E schedule so the piece can be traced to a room type or area.
- Revision letter: each change gets a new letter and a short description, so you never approve an outdated sheet by accident.
- Units: millimetres are standard; ask for imperial values in brackets if your site team works in inches.
Sheet 2: General arrangement and elevations
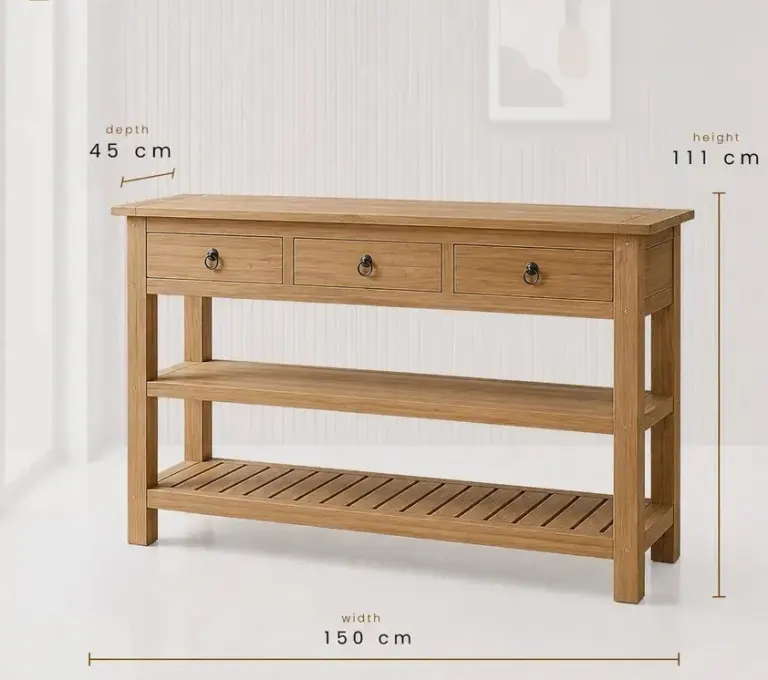
The elevations are the sheets most buyers look at first. You should receive at least a front elevation, a side elevation and a plan view, drawn at a readable scale such as 1:5 or 1:10.
What to check on the elevations
- Overall height, width and depth, with each dimension shown once and clearly.
- Top thickness and overhang beyond the legs or base.
- Leg or base position, including setback from the front edge of the top.
- Clearance under the table, if you plan to place stools, baskets or cleaning equipment below.
- Position of drawers, doors, shelves and any cut-outs.
Compare these numbers with the space on your architectural plan. A console that fits on paper but ignores a skirting board or a wall switch will cause trouble on site. For a deeper look at proportions, see our guide on overall sizes for different venues.
Sheet 3: Sections through the piece
Sections are where the real construction is revealed. A section is an imaginary cut through the table, showing the layers and thicknesses inside. This is also where the phrase joinery section details becomes practical.
Cross-section through the top
This view should show the top material, its thickness, the edge profile, any edge banding or solid lipping, and how the top connects to the frame. If the top is veneered, the drawing should state the core board type and the veneer thickness range.
Section through legs, rails or base
Here you check the cross-section size of each leg or rail, the junction between them and any hidden reinforcement. Slim designs often rely on a concealed steel plate or a deeper rail; if the design depends on it, it should be drawn, not assumed.
Section through drawers or doors
For storage models, ask for a section showing the drawer box, runner type, front overlay and reveal gaps. Doors should show hinge type, opening angle and shelf support.
Sheet 4: Joinery details
Joinery sheets show how parts are held together. These are usually enlarged details at 1:1 or 1:2, and they are the best indicator of long-term stability in busy hospitality use.
- Leg-to-top connection: mortise and tenon, dowels, corner blocks, or metal brackets, with sizes noted.
- Frame joints: how rails meet legs, and whether glue lines will be visible.
- Hidden fixings: screws, cams or bolts, and where they sit so they stay out of sight.
- Wall fixing: for tall, narrow or floating pieces, the anchor positions and bracket details.
If a piece is delivered knocked down, the drawing should also show which joints are assembled on site and which tools are required.
Sheet 5: Materials, finishes and hardware schedule
This sheet, often a table, ties every part to a specification. Ask that it lists each component separately rather than a general description such as "oak finish".
| Item | What the drawing should state |
|---|---|
| Top | Material, thickness, veneer or solid, edge profile |
| Frame | Timber species, grade, moisture control note |
| Finish | Type, colour reference, gloss level, sample number |
| Hardware | Runners, hinges, locks, levelling feet, brand or equivalent |
| Fire requirement | Any treatment or documentation needed for the destination |
The finish reference should point to a physical sample you have approved, not only a colour name. Names like "natural" or "walnut" mean different things to different people.
Sheet 6: Tolerances and notes
A short notes sheet is easy to overlook, yet it prevents many disagreements. It should state the general tolerance on dimensions, the flatness expected on the top, and how grain and colour variation in natural wood is handled.
It should also record assumptions: wall type, floor condition, and whether the table needs to sit against a skirting board. Where the site is uneven, adjustable feet or a notch in the back panel should appear on the drawing.
Sheet 7: Packing and installation notes
Many buyers forget this one. A good set includes a note on how the piece is packed, whether it ships assembled, and any fixing instructions for installers. For stone or glass tops, the note should show how the top is protected and secured.
File formats: PDF, CAD and 3D
For approval, a signed PDF is normally enough. If your design team coordinates in software, ask for furniture CAD drawings in DWG or DXF as well, so the piece can be placed on your room plans. A 3D view is helpful for understanding the look, but it should never replace dimensioned sheets.
A practical review routine
When the shop drawing console set arrives, avoid reviewing it alone. A short, structured routine works better than a quick glance.
- Check the overall dimensions against your plan and the available space.
- Compare the elevation with the approved design image or reference photo.
- Read the sections and confirm thicknesses and construction match what was discussed.
- Review joinery and fixing details with your contractor or installer.
- Match the finish and hardware schedule to approved samples.
- Sign and date the final revision, and keep a copy with the order.
Any comment should be written on the drawing and returned as a numbered revision, so both sides work from one version.
Common gaps to watch for
- Dimensions that appear on the render but not on the drawing.
- Sections missing for drawers, doors or the top edge.
- Finish described by name only, with no sample reference.
- No note on how wall-mounted or tall pieces are fixed.
- Several revisions in circulation without a clear latest version.
Next step
If you already have a reference photo, sketch or CAD file for a console, send it to us together with the quantity and destination. We will prepare a dimensioned drawing set for your review, and you can request a quotation once the details are clear.
Sıkça Sorulan Sorular
What drawings should I ask for before approving a console table?
Ask for a cover sheet with a revision log, front, side and plan elevations, sections through the top, legs and any drawers or doors, enlarged joinery details, and a materials, finishes and hardware schedule. A notes sheet covering tolerances and packing is also worth requesting.
Is a 3D render enough to approve a console table?
No. A render shows appearance but not construction, thicknesses or tolerances. Use it to judge the look, then approve dimensioned drawings with sections and joinery details. These are the documents the factory builds from and the ones you can refer to if a question arises later.
Which file formats should a factory provide?
A signed PDF is normally sufficient for approval. If your designers need to place the piece on room plans, ask for DWG or DXF files as well. A 3D file or image can accompany the set, but it should not replace the dimensioned sheets.
Can a manufacturer prepare drawings from a photo or sketch?
Usually yes. A factory can develop shop drawings from a reference photo, hand sketch or CAD file, though it will need key dimensions, quantity and finish preferences. Expect a first drawing set for review and one or more revisions before you sign it off.
What should I check first on a joinery detail?
Start with the leg-to-top connection, because this is where wobble and loosening usually begin. Check the joint type, the size of the parts, and any hidden reinforcement. Then look at how the piece is fixed to the wall, if it is tall, narrow or floating.
How do I handle changes after I sign the drawings?
Request them in writing as a new numbered revision and ask for updated sheets and a note on any effect on cost or lead time. Avoid verbal changes. Each revision should supersede the previous one, so the factory and your team always work from the same version.
Every hotel project is different. Send us your drawings or room schedule for a tailored proposal on materials, lead time and shipping.